International STEP-NC Demonstration
of Feed Optimization, High-Speed Machining, Tolerance-Driven
Tool Compensation, and Traceability
On March 10-12, 2008, the STEP Manufacturing team (ISO TC184 SC4 WG3
T24) met in Sandviken and Stockholm, Sweden to demonstrate and discuss
advanced uses of the STEP-NC AP238 standard. The participants in the demonstrations included
Airbus/Univ. Bordeaux, Boeing, Eurostep, KTH Royal Institute of
Technology, NIST, Sandvik Coromant, Scania, STEP Tools, and Univ. of
Vigo.
Highlights included:
- Feed and speed optimization:
Boeing, Sandvik Coromant, and STEP Tools showed how to improve nominal
machining process plans to generate optimized process plans just prior
to machining by adding cutter cross sectional area information to the
STEP-NC file.
- High-speed machining:
Airbus/Univ. Bordeaux, Sandvik Coromant, and STEP Tools showed HSM
with STEP-NC and demonstrated new approaches for representing large
volumes of toolpath curves.
- Tolerance-driven tool
compensation:
KTH Royal Institute of Technology, Eurostep, Sandvik Coromant, Scania,
and STEP Tools showed how STEP-NC machining information can be linked
with tolerances, wireless measuring equipment, and ISO 13399 tool
descriptions to simplify tool compensation for more accurate machining.
- Traceability:
Univ. of Vigo and NIST showed a series of traceability extensions for
linking STEP-NC machining programs with sensor feedback and machine
state information during execution.
- Contributions from France, Spain, Sweden, and USA
- Test parts from Airbus and Scania.
- Cutting Tools from Sandvik Coromant and Prototyp
|

Video of tolerance-driven tool compensation demonstration at Scania
(Updated 2008-10-22 with narration)
YouTube Video
Download: High quality [WMV, 36M]

Machining fishhead test part at Boeing Material & Process
Technology Lab, Renton, WA, to test feed/speed optimization on an
OKUMA MC-V4020.

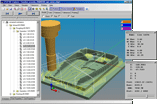
Cutting simulation view of Airbus fishhead test part showing
toolpaths with cross-section area information and feedrate boost.

Airbus fishhead test part, after high-speed machining by
Univ. Bordeaux.

A plot of spindle load from traceability experiments on fishhead machining.
Additional Meeting Files
Meeting Invitation
Meeting Agenda
Registration Form
|

