2.810 Fall 2013
Instructions to download and install SolidWorks 2013 SP 4.0
This page explains the procedure to download and install Solidworks 2013 SP 4.0. The system requirements to run SolidWorks properly can be found here: https://www.solidworks.com/sw/support/SystemRequirements.html. The following instructions are written for the Windows 7 operations sytem. The procedure should not be very different for other flavors of Windows. Note that this version of SolidWorks does not run on Windows XP.
If you encounter any problems with the download or installation, contact the TA.
Steps to download and install SolidWorks 2013 SP 4.0 on a Windows 7 machine:
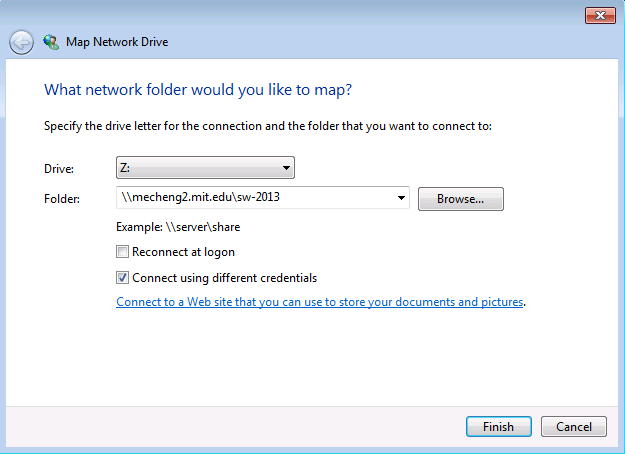
- Right-click on My Computer and choose "Map Network Drive".
- Choose any Drive which you are not currently using.
- Enter the following in the Folder field: \\mecheng2.mit.edu\sw-2013.
- When prompted for login information, enter the username and password which were provided to you in class.
- When the network drive opens, double click "StartSWInstall.hta" file, and you will be prompted to allow the installer to run. Click yes. You may be prompted for the login credentials a second time.
- The installer may take several minutes to finish.
- When you run the program the first time, you will be prompted to activate the product. You can run the product for 30 days without activating it. The activation process is quite simple. It asks you to fill out a form with your name, email address, school information etc.


This information was last
updated
Copyright (C) by Timothy G. Gutowski, 1997